 Save
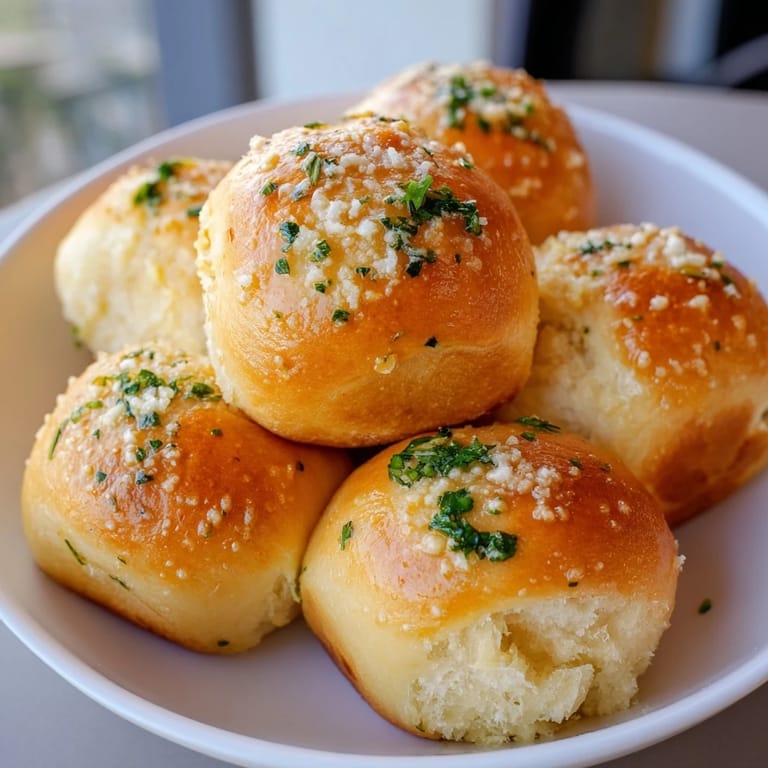
Save My neighbor dropped off a basket of these garlic butter rolls last fall, still steaming in a kitchen towel, and I couldn't stop eating them straight from the basket. What struck me wasn't just how soft they were, but how the garlic had turned almost caramel-sweet in the oven, filling her kitchen—and mine—with that irresistible smell. I finally asked for her method, and it turns out the secret is simpler than I thought: good dough, melted butter infused with fresh garlic and parsley, and the wisdom to let them rise twice so they stay tender even when pulled apart by eager hands.
I made these for a quiet Sunday potluck once, slightly nervous because the pan felt heavy and warm as I carried it to the table. The moment I set them down, three people immediately reached in without waiting for anything else—no salad, no main course, just straight to the bread. That's when I realized this recipe wasn't just a side dish; it was the thing people actually wanted.
Ingredients
- All-purpose flour (3 cups): The foundation of everything; make sure it's fresh so your dough rises properly and feels alive in your hands.
- Instant yeast (2¼ tsp): Check the expiration date before you start, because old yeast will leave you with a flat, sad bread no garlic butter can fix.
- Warm milk (1 cup): Too hot and you'll kill the yeast; too cold and nothing happens—that 110°F sweet spot matters more than you'd think.
- Unsalted butter (2 tbsp for dough, 6 tbsp for garlic butter): Melted and warm, it should feel silky, never separated or greasy.
- Garlic (4 cloves): Mince it fine so it disperses evenly; chunky pieces can turn bitter in the oven, and nobody wants that surprise.
- Fresh parsley (2 tbsp): This adds brightness and keeps the garlic butter from feeling one-note and heavy.
- Parmesan cheese (2 tbsp, optional): Use the good stuff if you add it; the cheap stuff won't melt right and tastes papery.
- Salt and pepper: A pinch in the garlic butter layer gives you that restaurant-quality finish.
Tired of Takeout? 🥡
Get 10 meals you can make faster than delivery arrives. Seriously.
One email. No spam. Unsubscribe anytime.
Instructions
- Mix your dough base:
- Combine flour, yeast, sugar, and salt in a large bowl, then pour in warm milk and melted butter. Stir until everything comes together in a shaggy, rough dough—don't worry about perfection yet, that comes next.
- Knead until silky:
- Work the dough on a floured surface for 7 to 8 minutes until it stops being sticky and develops a smooth, elastic feel under your palms. If using a stand mixer, let the dough hook do this in about 5 minutes.
- Let it rise:
- Place the dough in a greased bowl, cover it loosely, and let it sit in a warm spot for about an hour until it's roughly double in size. You'll feel it puff up as the yeast wakes up and does its work.
- Prepare the magic layer:
- While the dough rises, melt butter and stir in minced garlic, fresh parsley, salt, and pepper in a small bowl. The smell alone will convince you this is worth the effort.
- Shape and coat:
- Once risen, punch down the dough gently and divide it into 12 equal pieces—I use a bench scraper to make this cleaner. Roll each piece into a ball, then dip it in the garlic butter until well coated, and arrange them in a greased 9-inch round pan with the buttery sides facing up. Drizzle any remaining butter over the top so nothing dries out.
- Second rise:
- Cover loosely with plastic wrap and let the rolls sit for 20 to 30 minutes until they look slightly puffy and are just touching each other. They don't need to rise as much as the first time.
- Bake to golden:
- Preheat your oven to 350°F, add a sprinkle of Parmesan if you're using it, then bake for 22 to 25 minutes until the rolls are deep golden brown on top and smell like a bakery. A toothpick inserted into the center should come out clean, not doughy.
- Cool and serve:
- Let them rest for just 5 minutes—I know it's hard to wait—then serve them warm, pulling them apart right at the table while everyone watches.
 Save
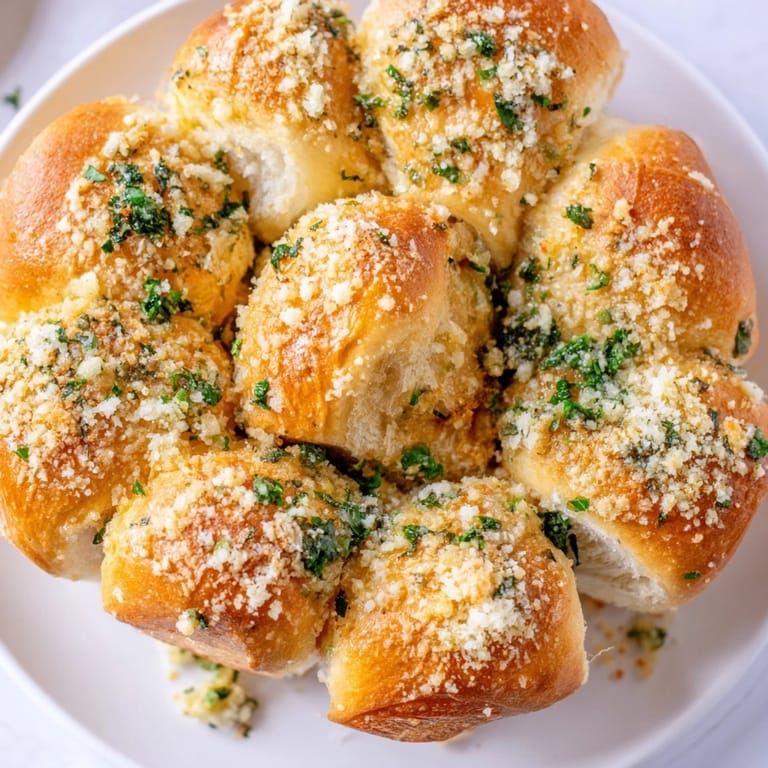
Save There's something about breaking off a warm roll from the pan and watching the butter glisten under the kitchen light that makes everything feel like celebration, even on an ordinary Tuesday. That moment—when bread is still steaming and the kitchen smells like a dream—is why this recipe keeps showing up at my table.
Why This Recipe Works Every Time
The genius of this bread is that garlic butter does most of the work for you. You're not fighting with a complicated dough or finicky techniques; you're just letting time and warmth do what they do naturally. The dough itself is forgiving enough for a beginner but satisfying enough for someone who's been baking for years. Once those rolls start baking, the house fills with a smell so good that people will appear in your kitchen asking what's happening, and you'll get to tell them you made it.
Variations That Feel Like New Recipes
I've added chili flakes to the garlic butter on nights when I wanted warmth and a little danger, and it transforms everything into something bolder and less expected. For a version that's almost a meal, I've tucked small cubes of mozzarella into the center of some rolls before baking, so you get that gooey surprise when you pull one open. These rolls also pair beautifully alongside tomato soup on cold evenings, or as a savory companion to pasta dishes when bread is the best part of dinner anyway.
- Fresh herbs like basil or thyme can replace parsley if you want to shift the flavor without changing the structure.
- If you find yourself with leftovers (rare, but possible), wrap them well and reheat gently to bring back the softness.
- A light brush of egg wash before baking will give you an even more golden, professional-looking finish.
The Comfort in Sharing
Bread that falls apart in your hands naturally becomes something people share. There's no cutting, no serving spoon, just hands reaching in and pulling, which somehow makes eating together feel less formal and more real. These rolls have a way of bringing people to the table in a different way than other foods do.
 Save
Save These rolls prove that some of the best things to cook are the ones where butter, garlic, and patience do almost all the talking. The next time you want to feel like you've created something special, this is your answer.
Recipe FAQ
- → How do I achieve soft, fluffy bread rolls?
Knead the dough until smooth and elastic, and allow it to rise in a warm place until doubled in size. This develops gluten and lightens the texture.
- → Can I add extra flavor to the garlic butter?
Yes, incorporate herbs like parsley or a pinch of chili flakes into the garlic butter for a personalized twist.
- → What is the best way to shape the rolls for easy pull-apart?
Divide the dough into equal-sized balls, dip each in the garlic butter, and arrange them close together in a round pan to encourage pulling apart after baking.
- → Is Parmesan optional when topping the bread?
Parmesan adds a savory, cheesy note but can be omitted if preferred or for dietary restrictions.
- → How do I store leftovers to keep them fresh?
Store cooled rolls in an airtight container at room temperature for up to two days, or freeze and reheat gently before serving.
- → Can I prepare the dough ahead of time?
The dough can be made the day before and refrigerated after the first rise, allowing for baking fresh rolls when needed.