 Save
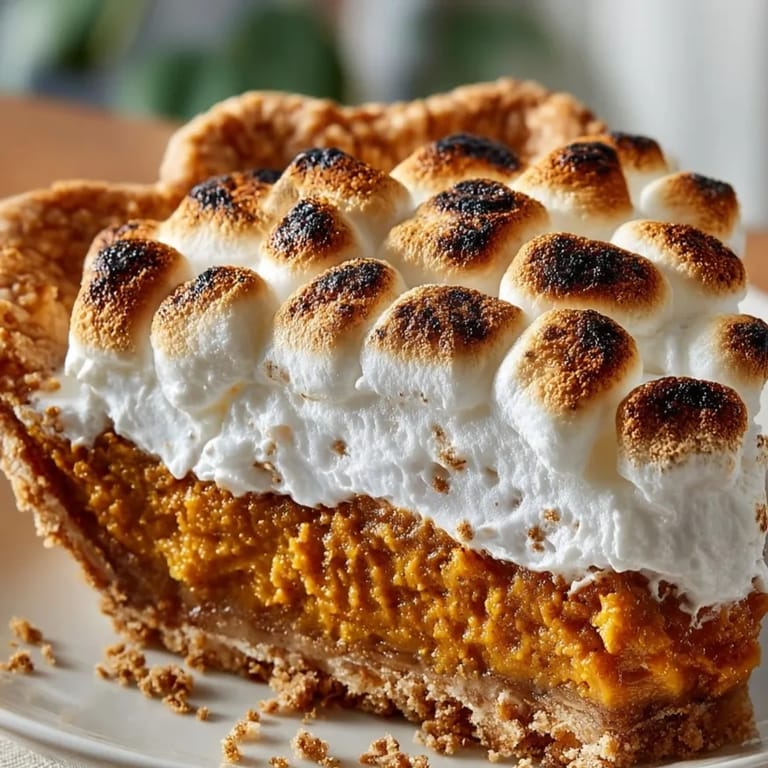
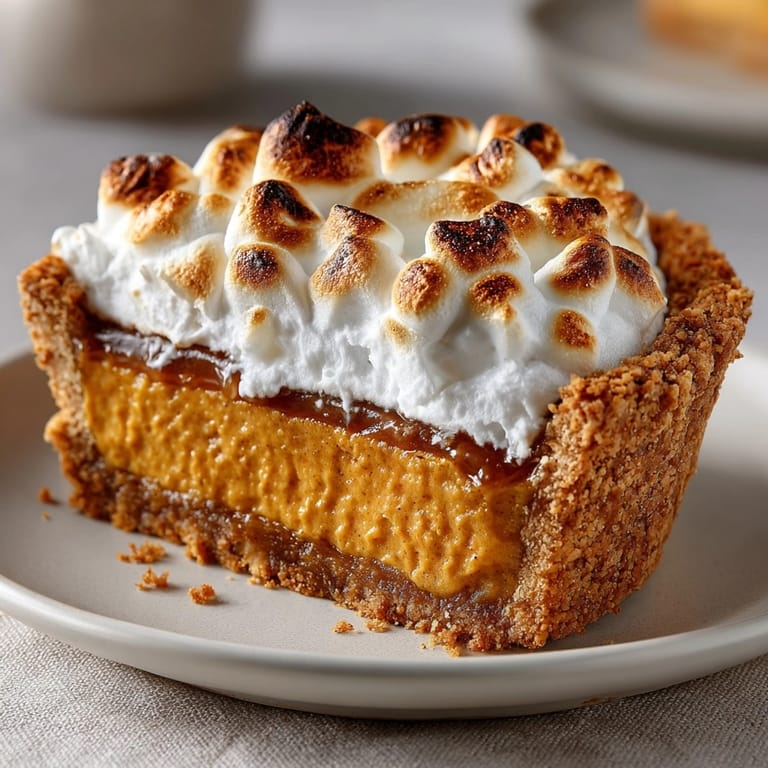
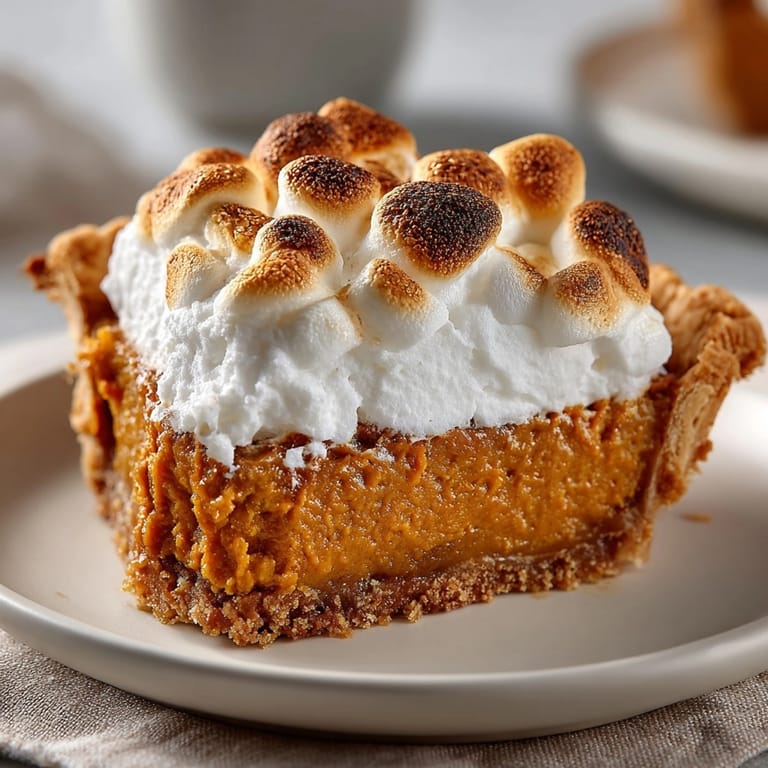
Save This sweet potato pie with marshmallow topping delivers on nostalgia and pure comfort every time I bake it. The creamy filling is warmly spiced and sits in a flaky crust, while the gooey toasted marshmallows make every bite festive. It is always a showstopper on holiday tables but just as welcome for any cozy night at home.
My first pie came together on a whim when I needed a quick Thanksgiving dessert that used up leftover sweet potatoes. The marshmallows came about when my kids insisted on s’mores flavors, and now they argue over who gets the corner slice with the most topping.
Ingredients
- Pie crust: Essential for structure and texture Choose a store-bought version for convenience or make your own for extra flakiness. Look for golden color and minimal cracking.
- Sweet potatoes: The superstar ingredient Use deeply orange-fleshed varieties for natural sweetness and smooth texture. Bake or boil until very tender before mashing.
- Granulated sugar: Brings just the right level of sweetness Use cane sugar for best flavor and even melting.
- Whole milk: Adds creaminess and helps the custard set Select full-fat milk for richness: avoid low-fat for best results.
- Eggs: Allow the pie to set to a sliceable custard Choose large eggs for consistent measuring.
- Unsalted butter: Lends smoothness and flavor Melt before mixing to make sure it combines evenly.
- Vanilla extract: Deepens flavor accents Go for pure extract for a richer aroma.
- Ground cinnamon: Classic warming note in every good sweet potato pie Pick a fresh jar for best flavor.
- Ground nutmeg: Provides cozy warmth Grate whole nutmeg if possible for max punch.
- Ground ginger: Lends subtle heat and complexity Fresh ground ginger powder gives more fragrance.
- Salt: A must for balancing sweetness Opt for fine sea salt to dissolve quickly.
- Mini marshmallows: That iconic gooey topping Look for the softest freshest bag so they melt and toast perfectly.
Tired of Takeout? 🥡
Get 10 meals you can make faster than delivery arrives. Seriously.
One email. No spam. Unsubscribe anytime.
Instructions
- Preheat the Oven:
- Preheat your oven to 350 degrees Fahrenheit or 175 degrees Celsius. This ensures even baking right from the start and prevents soggy crusts.
- Prepare the Pie Crust:
- Place your ready or homemade pie crust into a 9-inch pie dish. Press gently to fit it snugly along the base and up the sides. Crimp or flute the edges as you like for a decorative finish then set aside.
- Make the Sweet Potato Filling:
- In a large mixing bowl, add your mashed sweet potatoes, sugar, milk, eggs, melted butter, vanilla extract, cinnamon, nutmeg, ginger, and salt. Using a whisk or electric mixer, blend until completely smooth. There should be no lumps for the most silk-like filling.
- Fill and Smooth the Pie:
- Pour your sweet potato filling into the prepared pie crust. Use a spatula to smooth the top so it bakes up evenly and looks polished when slicing.
- First Bake:
- Place the pie on the center oven rack and bake for 45 to 50 minutes. Check doneness by inserting a knife in the center—when it comes out clean and the middle jiggles just slightly it is ready. If the edges are browning too quickly cover lightly with foil.
- Cool Before Topping:
- Once the pie is baked through, remove it from the oven and let it cool for 10 minutes. This brief rest helps the surface set so your marshmallows will sit properly and not melt into the filling.
- Add the Marshmallow Topping:
- Sprinkle mini marshmallows evenly over the pie’s surface. Make sure you get coverage to the edge for full gooey effect.
- Toast the Marshmallows:
- Return the pie to the oven for another 5 to 7 minutes. Watch carefully as marshmallows toast and puff to a golden brown. They can burn quickly so do not walk away.
- Final Cool and Serve:
- Let the pie cool for at least 30 minutes before slicing. This ensures tidy cuts and a filling that holds together instead of oozing.
 Save
Save I am always amazed at how orange-fleshed sweet potatoes yield the richest silkiest pie. My family laughs about my grandmother’s rule of hand-mashing with a wooden spoon for nostalgia: plus those last little bits make the filling especially memorable. This pie brings everyone running into the kitchen before it has even cooled.
Storage Tips
Refrigerate leftovers covered in the pie dish or in airtight containers for up to four days. For best texture allow slices to come to room temperature before serving or warm gently in an oven for a few minutes to revive the marshmallow topping. If you plan to bake ahead wait to add marshmallows until right before serving and briefly re-toast as needed.
Ingredient Substitutions
For a dairy-free version swap whole milk and butter with canned coconut milk and vegan butter. Try brown sugar instead of white sugar for a hint of molasses flavor. Gluten-free pie crusts work just as well especially when par-baked before filling. If you cannot find mini marshmallows slice large ones into small bits or swirl in a vegan alternative if needed.
Serving Suggestions
I love to bring this pie out for holiday feasts alongside pumpkin and pecan pies. Drizzle a bit of warm caramel sauce over each slice for added glamour or top with a dollop of whipped cream for extra decadence. It also holds its own with a hot cup of coffee or spiced tea for a post-dinner treat.
Cultural and Historical Context
Sweet potato pie is a cornerstone dessert across the American South with roots stretching to African American culinary traditions. For generations cooks have adapted the recipe with family tweaks often passing along seasoning secrets. Marshmallow toppings became popular in the mid-1900s as sugar’s availability increased and families wanted to make pies stand out on special occasions.
Seasonal Adaptations
Swap ground ginger for a tablespoon of orange zest in spring Try adding a pinch of cloves around Thanksgiving for tradition Top with maple-glazed pecans instead of marshmallows for a wintery twist
Success Stories
A neighbor once told me this was the only dessert her picky son would eat at Thanksgiving. Another friend made it for her book club and had to email the recipe the very next day. There is always someone asking for second helpings and it disappears faster than you think.
Freezer Meal Conversion
You can freeze the fully baked and cooled pie without the marshmallow topping. Wrap tightly and label well Freeze for up to two months. Thaw overnight in the fridge then add marshmallows and bake at 350 until hot and golden for that freshly made effect.
 Save
Save This pie is simply irresistible with its creamy filling and gooey topping. Make it once and it will become a holiday staple for years to come.
Recipe FAQ
- → What type of sweet potatoes should I use?
Orange-fleshed sweet potatoes provide a creamy texture and vibrant flavor, perfect for this dish.
- → Can I make the crust from scratch?
Homemade crust offers great flavor and flakiness, but a store-bought version works well to save time.
- → How do I prevent marshmallows from burning?
Keep an eye on the topping during baking and remove the dessert as soon as marshmallows turn golden brown.
- → Is it possible to make this dessert ahead?
Bake the pie a day ahead and add marshmallows just before serving to maintain their soft, toasted texture.
- → Can I add extra flavors to the sweet potato filling?
Try orange zest or a pinch of cloves in the mixture for an uplifting citrus note or extra warmth.
- → What can I serve with sweet potato pie?
A dollop of whipped cream or a drizzle of caramel sauce complements the pie’s creamy and nutty flavors.